GeoForm
When opening the application, you will be required to enter your username and password. If you are not authenticated, you will not be able to connect to the server to download or submit forms. You will still be able to use all the functions of the application. This will allow you to work in off-line mode (see description of layers section below). Once you have logged in, you will see the main screen of the application.

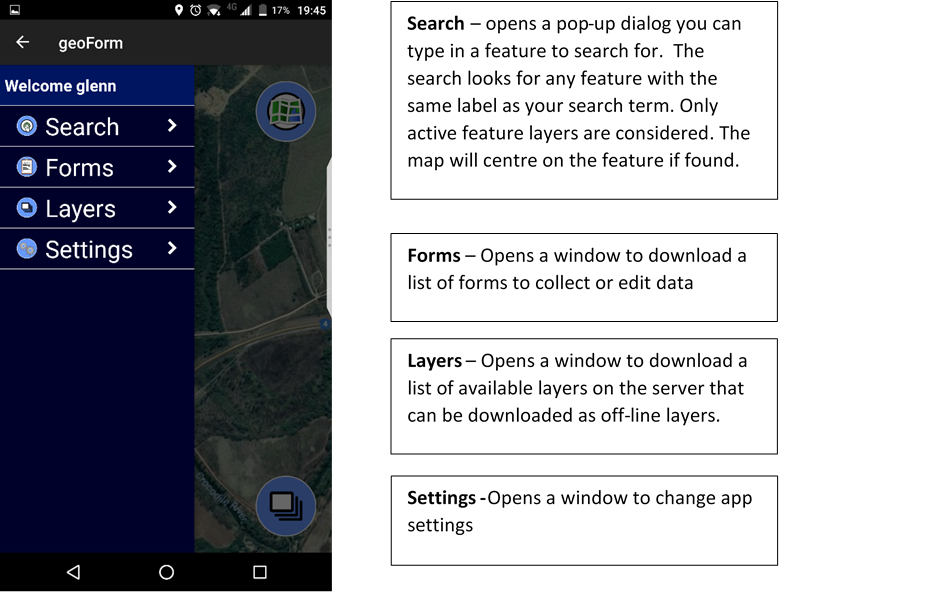
After tapping on the menu bar (or sliding your finger left to right, starting from the left edge of the screen) you will have access to the following:
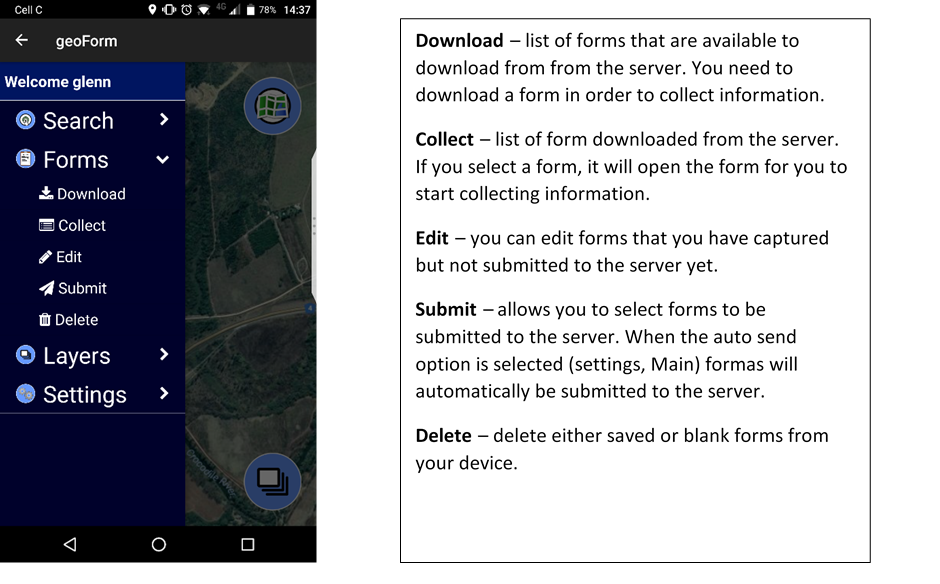
Forms menu
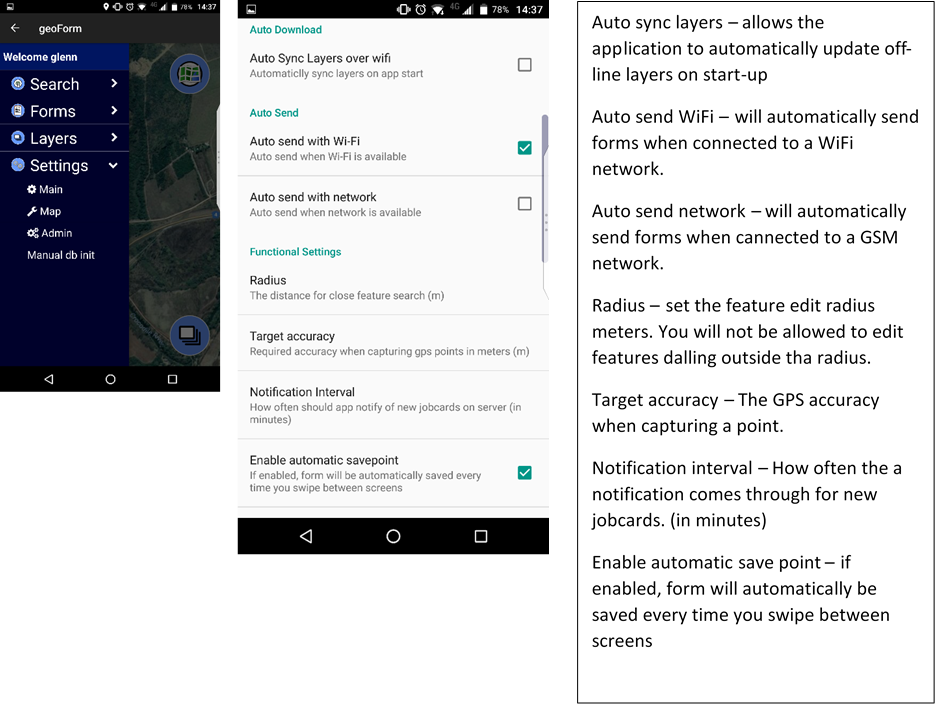
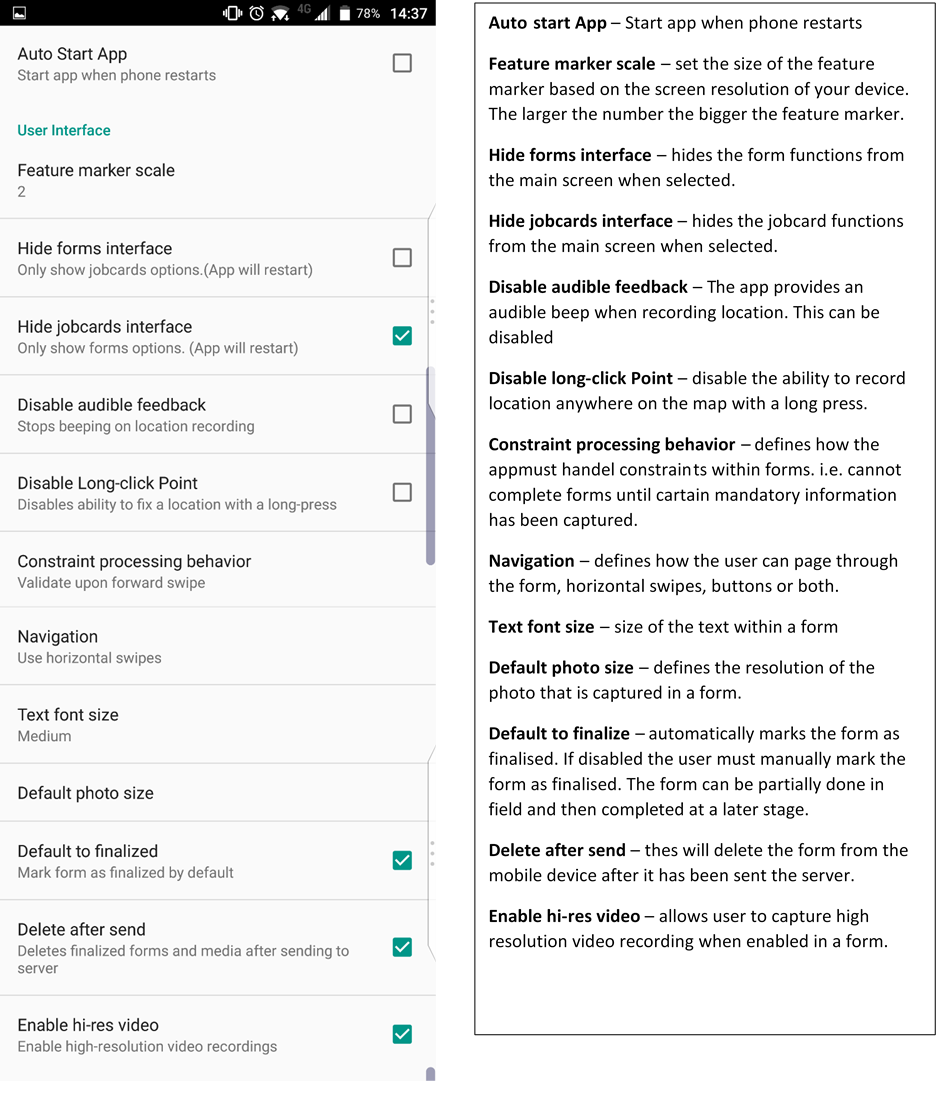
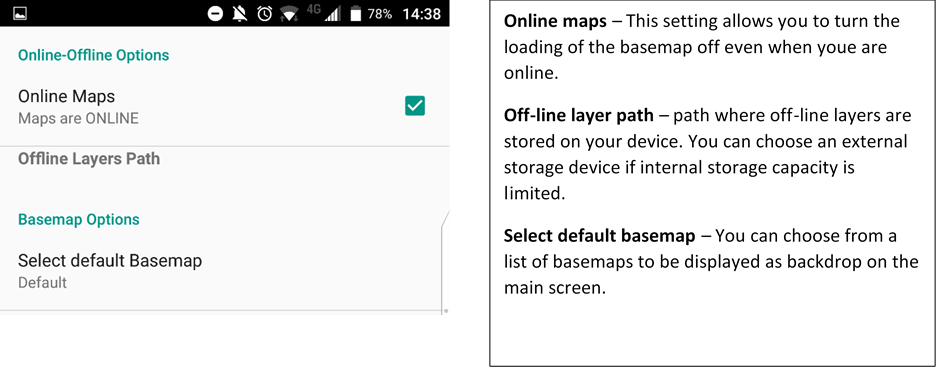
Settings menu (map)
Layers menu
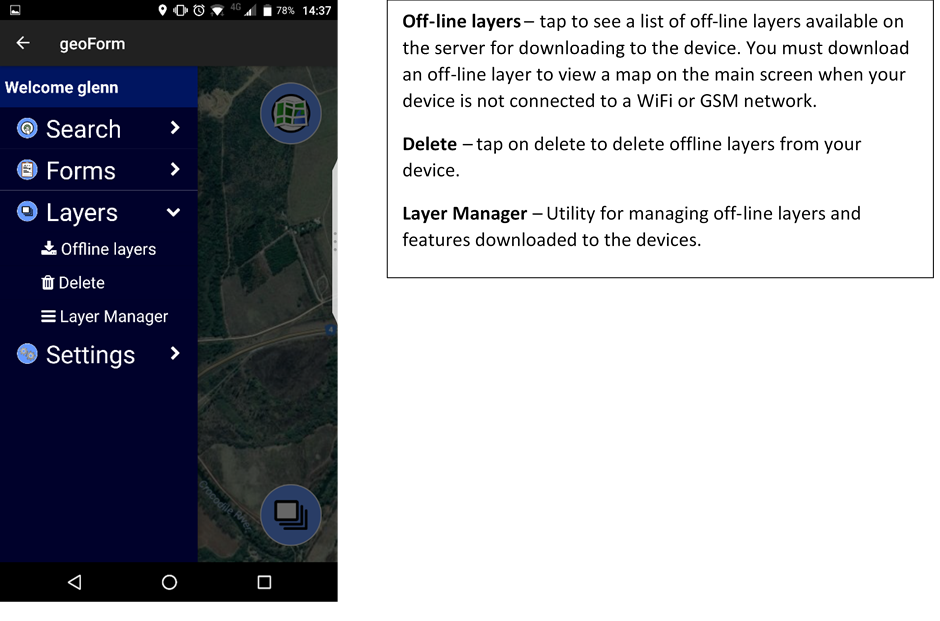
Off-line layers
Tap on Offline layes of the Layers menu to see the available layers that can be downloaded from the server. Tick the layers that you need and press on the back button. The download log will list the process.
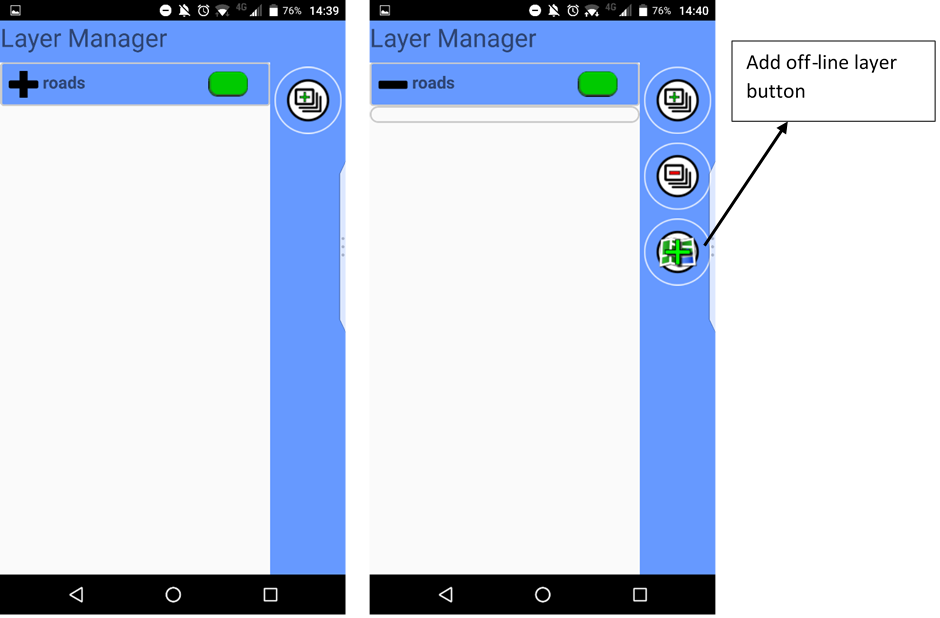
Layers menu (layer manager):
Use the layer manager to add, delete and manage layer groups. A layer typically includes:
- raster map – image tiles (raster) that provides a backdrop map in the main screen. This map will only be available if you are connected to a network.
- Off-line features - features (vectors) that can be viewed and edited e.g. a building.
- Forms – forms associated (or linked) with features that allow you to update existing features or capture new features.
Once the layer group has been created you can add an off-line layer (map and associated features) and associated form that has been downloaded from the server. Tap on the plus (+) button to open the layer group. Tap on the add off-line layer button, to list the downloaded off-line layers that needs to be added to the layer group. The layers need to be added to a group to be visible in the map view. Note that you can have any number of layers in a layer group. Swipe to the right to delete an off-line layer map or form from your layer group.
You can change the format of the feature markers in forms by tapping on the menu tab and selecting your preferred marker. Just press the back button to save your changes.
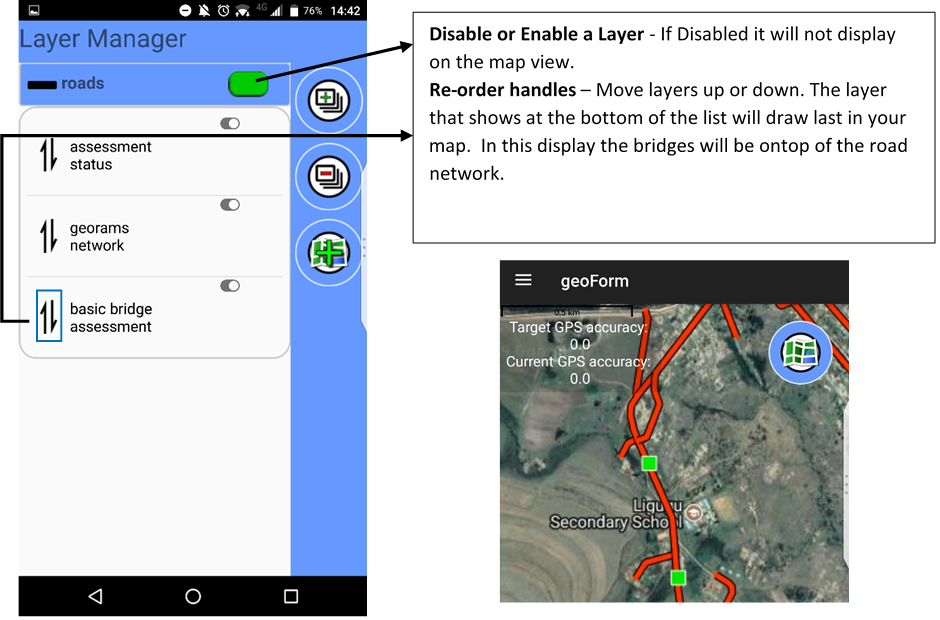
Layer groups can be disabled or enabled by tapping on the green button next to the layer group name. Disabled layer groups will not show on the main map or be used in searches. (All forms will still show if you go to the Forms -> Collect option in the side menu.)
Within a layer group, you can re-order the layers by dragging them by the re-order handles. In this way you can ensure that your features appear on top of your off-line map on the mains screen of the app.
Feature information
Once the layer manager has been configured, the features will appear on the main screen. Tapping on the feature will open a detailed view, showing attribute information about the feature.
When tapping inside the feature search radius, the app looks for any active features in that radius. If more that one record is found the app will list all the features in the radius. Tap on a feature to see the detail information.
Swipe screen to the left to see the edit data forms. Tap on the information that needs to be edited, and continue to update the information in the form. These forms will be pre-filled with information existing in the database
If none are found, the capture new feature screen will open with all forms tagged as capture new feature forms in the list. Tap on the form that needs to be captured. Move screen from right to left to continue on the next page until you get to the end of the form. Click on Save Form when data has been captured. The information will be sent/submitted to the database once the device is connected to a network.
The mobile application supports the ability to capture a location (point) or a geometry (line or polygon with many points) within a form. When configured in a form, you will see the following screen appear within the form. Tap the “Play” button at the top right of the screen to enable auto-recording of points. The GeoTrace Instructions dialog opens. Here you can set the recording interval and frequency as you desire.
Once the recording has started, a point is recorded (while walking or driving) every so many seconds with a beep sound. (you can disable the sound in Settings). You can pause the recording by tapping on the “Pause” button. To save your line, point or shape you must first pause your recording.

While Paused, there are a few options available to you:
- Save – this exits the map and returns to the form.
- Resume - Resume recording using the Play button.
- Select – touch a marker to select it.
Once a marker is selected, you can :
- Delete – Click the Marker delete button to remove the selected marker
To deselect a marker, just touch it again.
A manual recording can also be done by tapping on the manual record button. Long-press on the map (if enabled in Settings). This is useful if you are tracing features from a satellite basemap instead of walking or driving around them. When adding points like this, the Clear button appears. This deletes the points one-by-one from the last one added, backwards. To change your basemap, tap on the Layers button in the bottom right corner. Be aware that you will need a network connection (GSM or WiFi) for basemaps to load.